Brunswick Stew

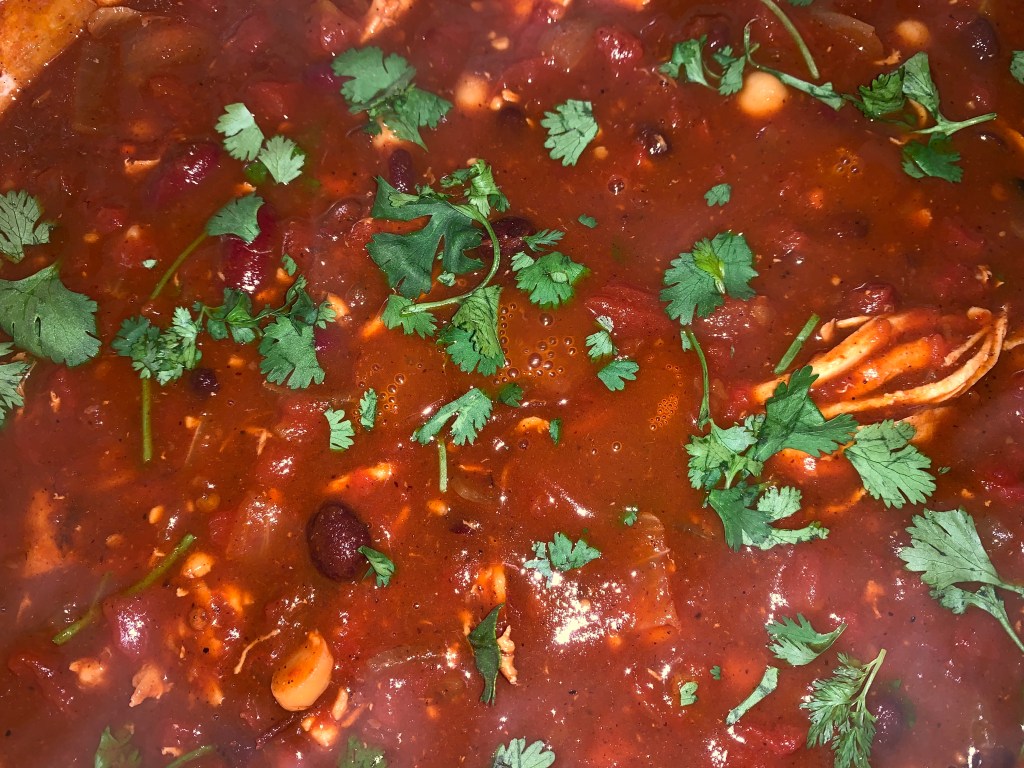
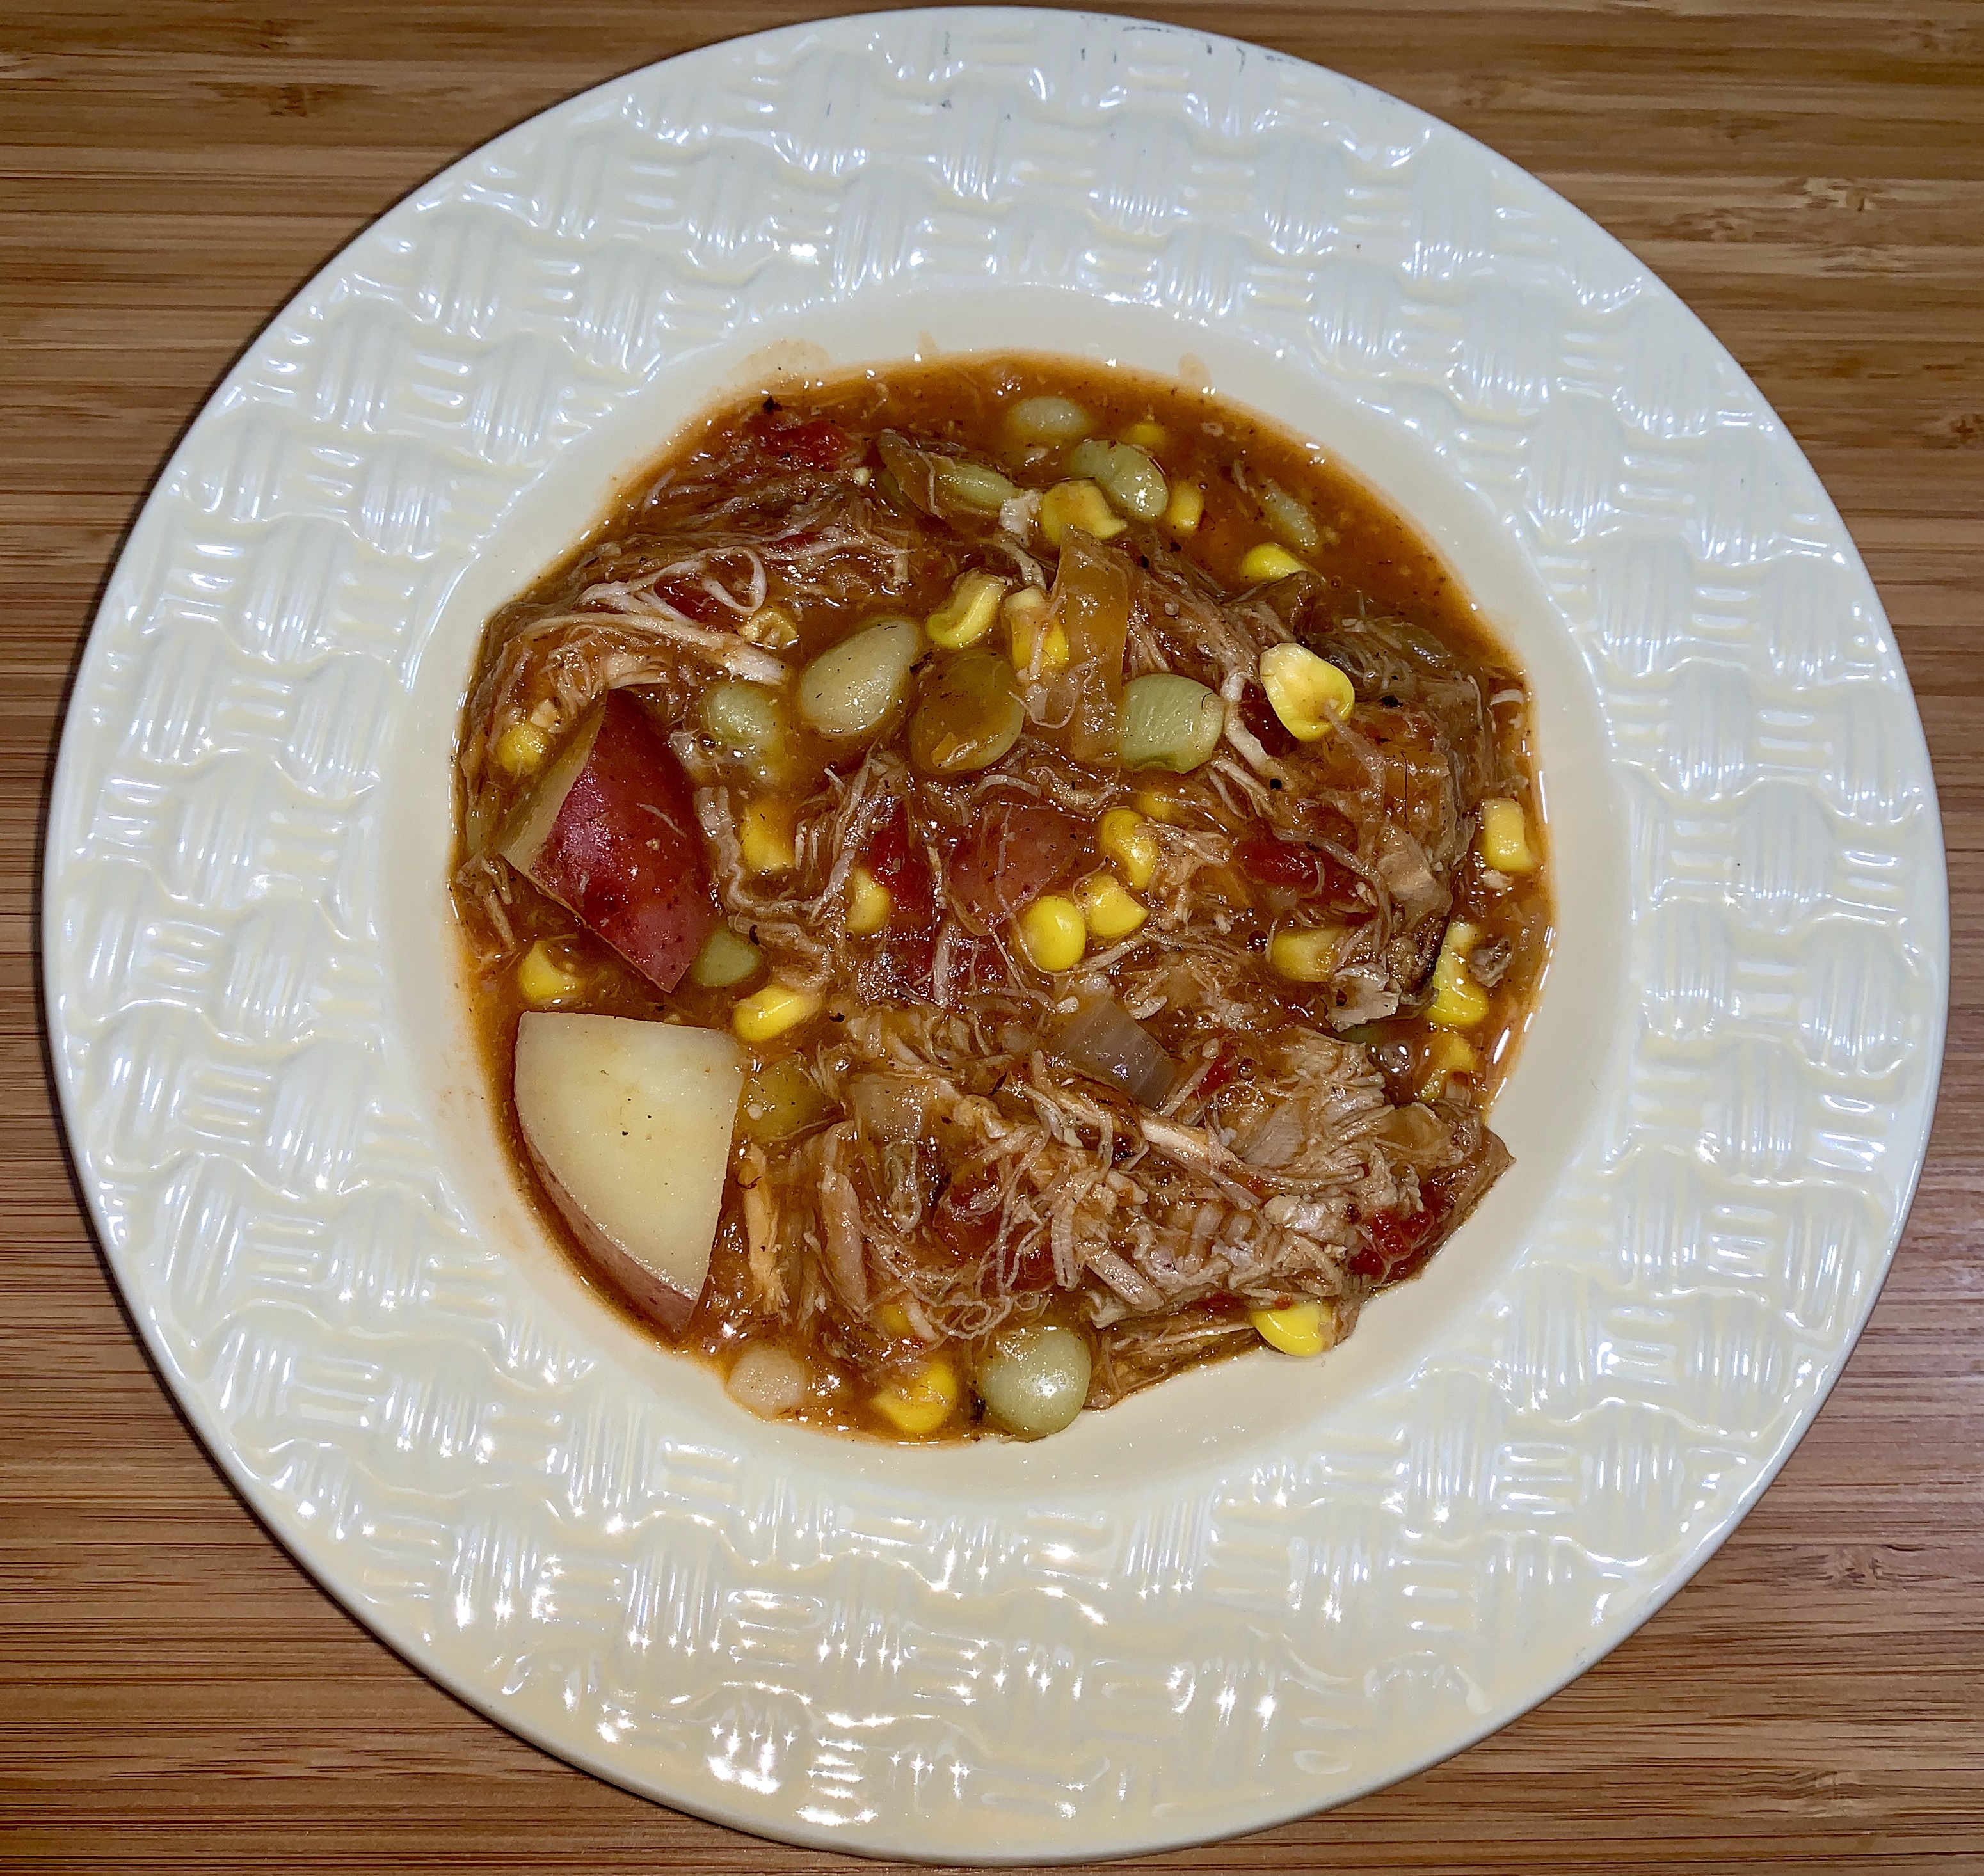
One of my favorite things growing up in South Georgia was Brunswick Stew. Despite that – until this week, I’d never made it. As I normally do when I develop a recipe that is inspired by something I’ve had before, I thought about all the things that I like about the dishes I’ve had. For Brunswick stew – I like corn, potatoes and lima beans. I like both shredded chicken and pork. And, I like a little bit of a ‘bite’ or acidity. These are some of the items I included (in addition to the meat, potatoes and onion).

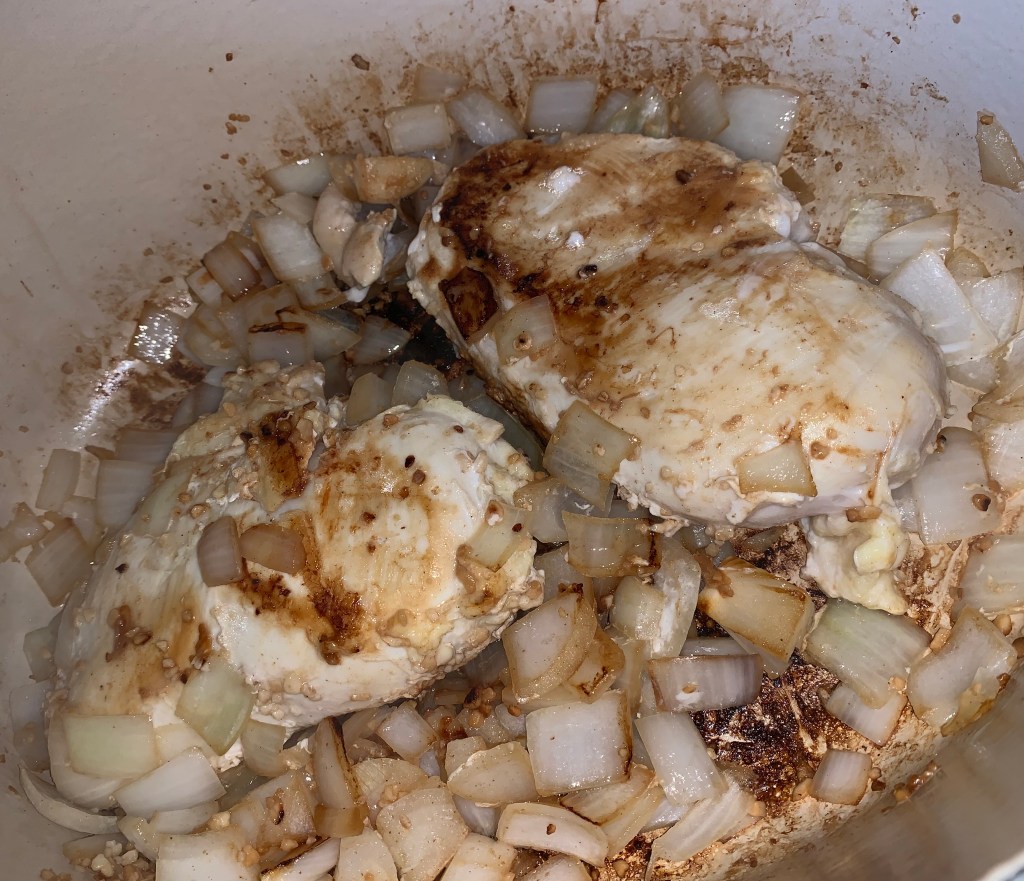
This recipe started with cooking the meats. I did the chicken thighs in the instant pot. I used the same method as I mentioned, when I made Chicken Noodle Soup/Stew the other day. Both in cooking and in shredding the chicken. Again – I will never do it another way again, ever!

The pork was a whole other thing. I started by trying to cook the boston butt roast in the crock pot, but despite the fact that I cooked it on low for 8 hours – and then turned it up to high for another 2 hours, I simply could not get it up to 190 degrees, internally, which is needed to get it to shred. Ultimately, I moved it to the instant pot and finished it off there. For the most part, I shredded it the same as the chicken – using a hand held mixer.

I kind of made this dish in stages: I did the pork the day before, I did the chicken in the AM, I prepped the onions and potatoes in the afternoon (Then I went to see Downton Abbey!) and, finally, made the Brunswick stew in the evening. I mention that to say that you have the option to do all the prep work ahead of time – and then ‘throw it together’ for a pretty amazing (and relatively quick) dinner!

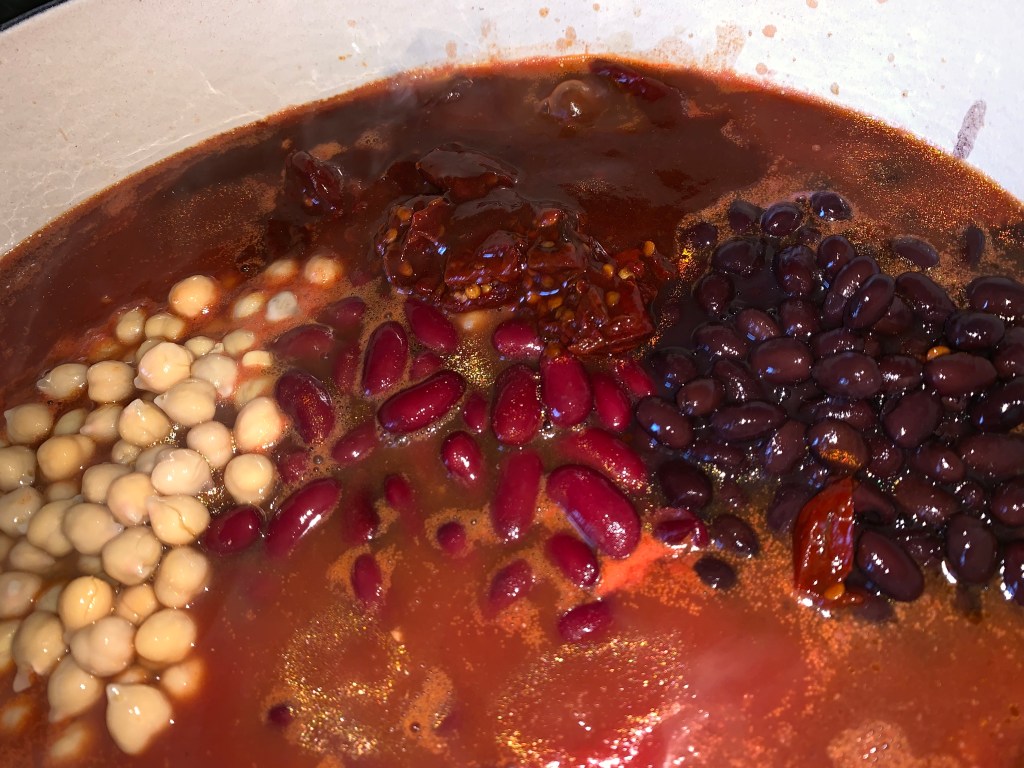
Once I was home from seeing Downton Abbey (If you haven’t seen it, and you’re a fan of the show, you should!!), I started putting it all together. Starting with browning the onion and garlic in my dutch oven. The rest was pretty much dumping things in and letting it all come together in the pot – so not a lot of pictures.

Despite this being the first time that I’ve made Brunswick stew – it will definitely not be my last. I’m not even sure what has kept me from making it! The flavors that I pulled together in this one are EXACTLY all the things that I love about Brunswick stew!

** Note: you can add more chicken stock if it is too thick, but remember that Brunswick Stew should be thick.

Brunswick Stew

Total cook time: 20 min prep, 90 min cook
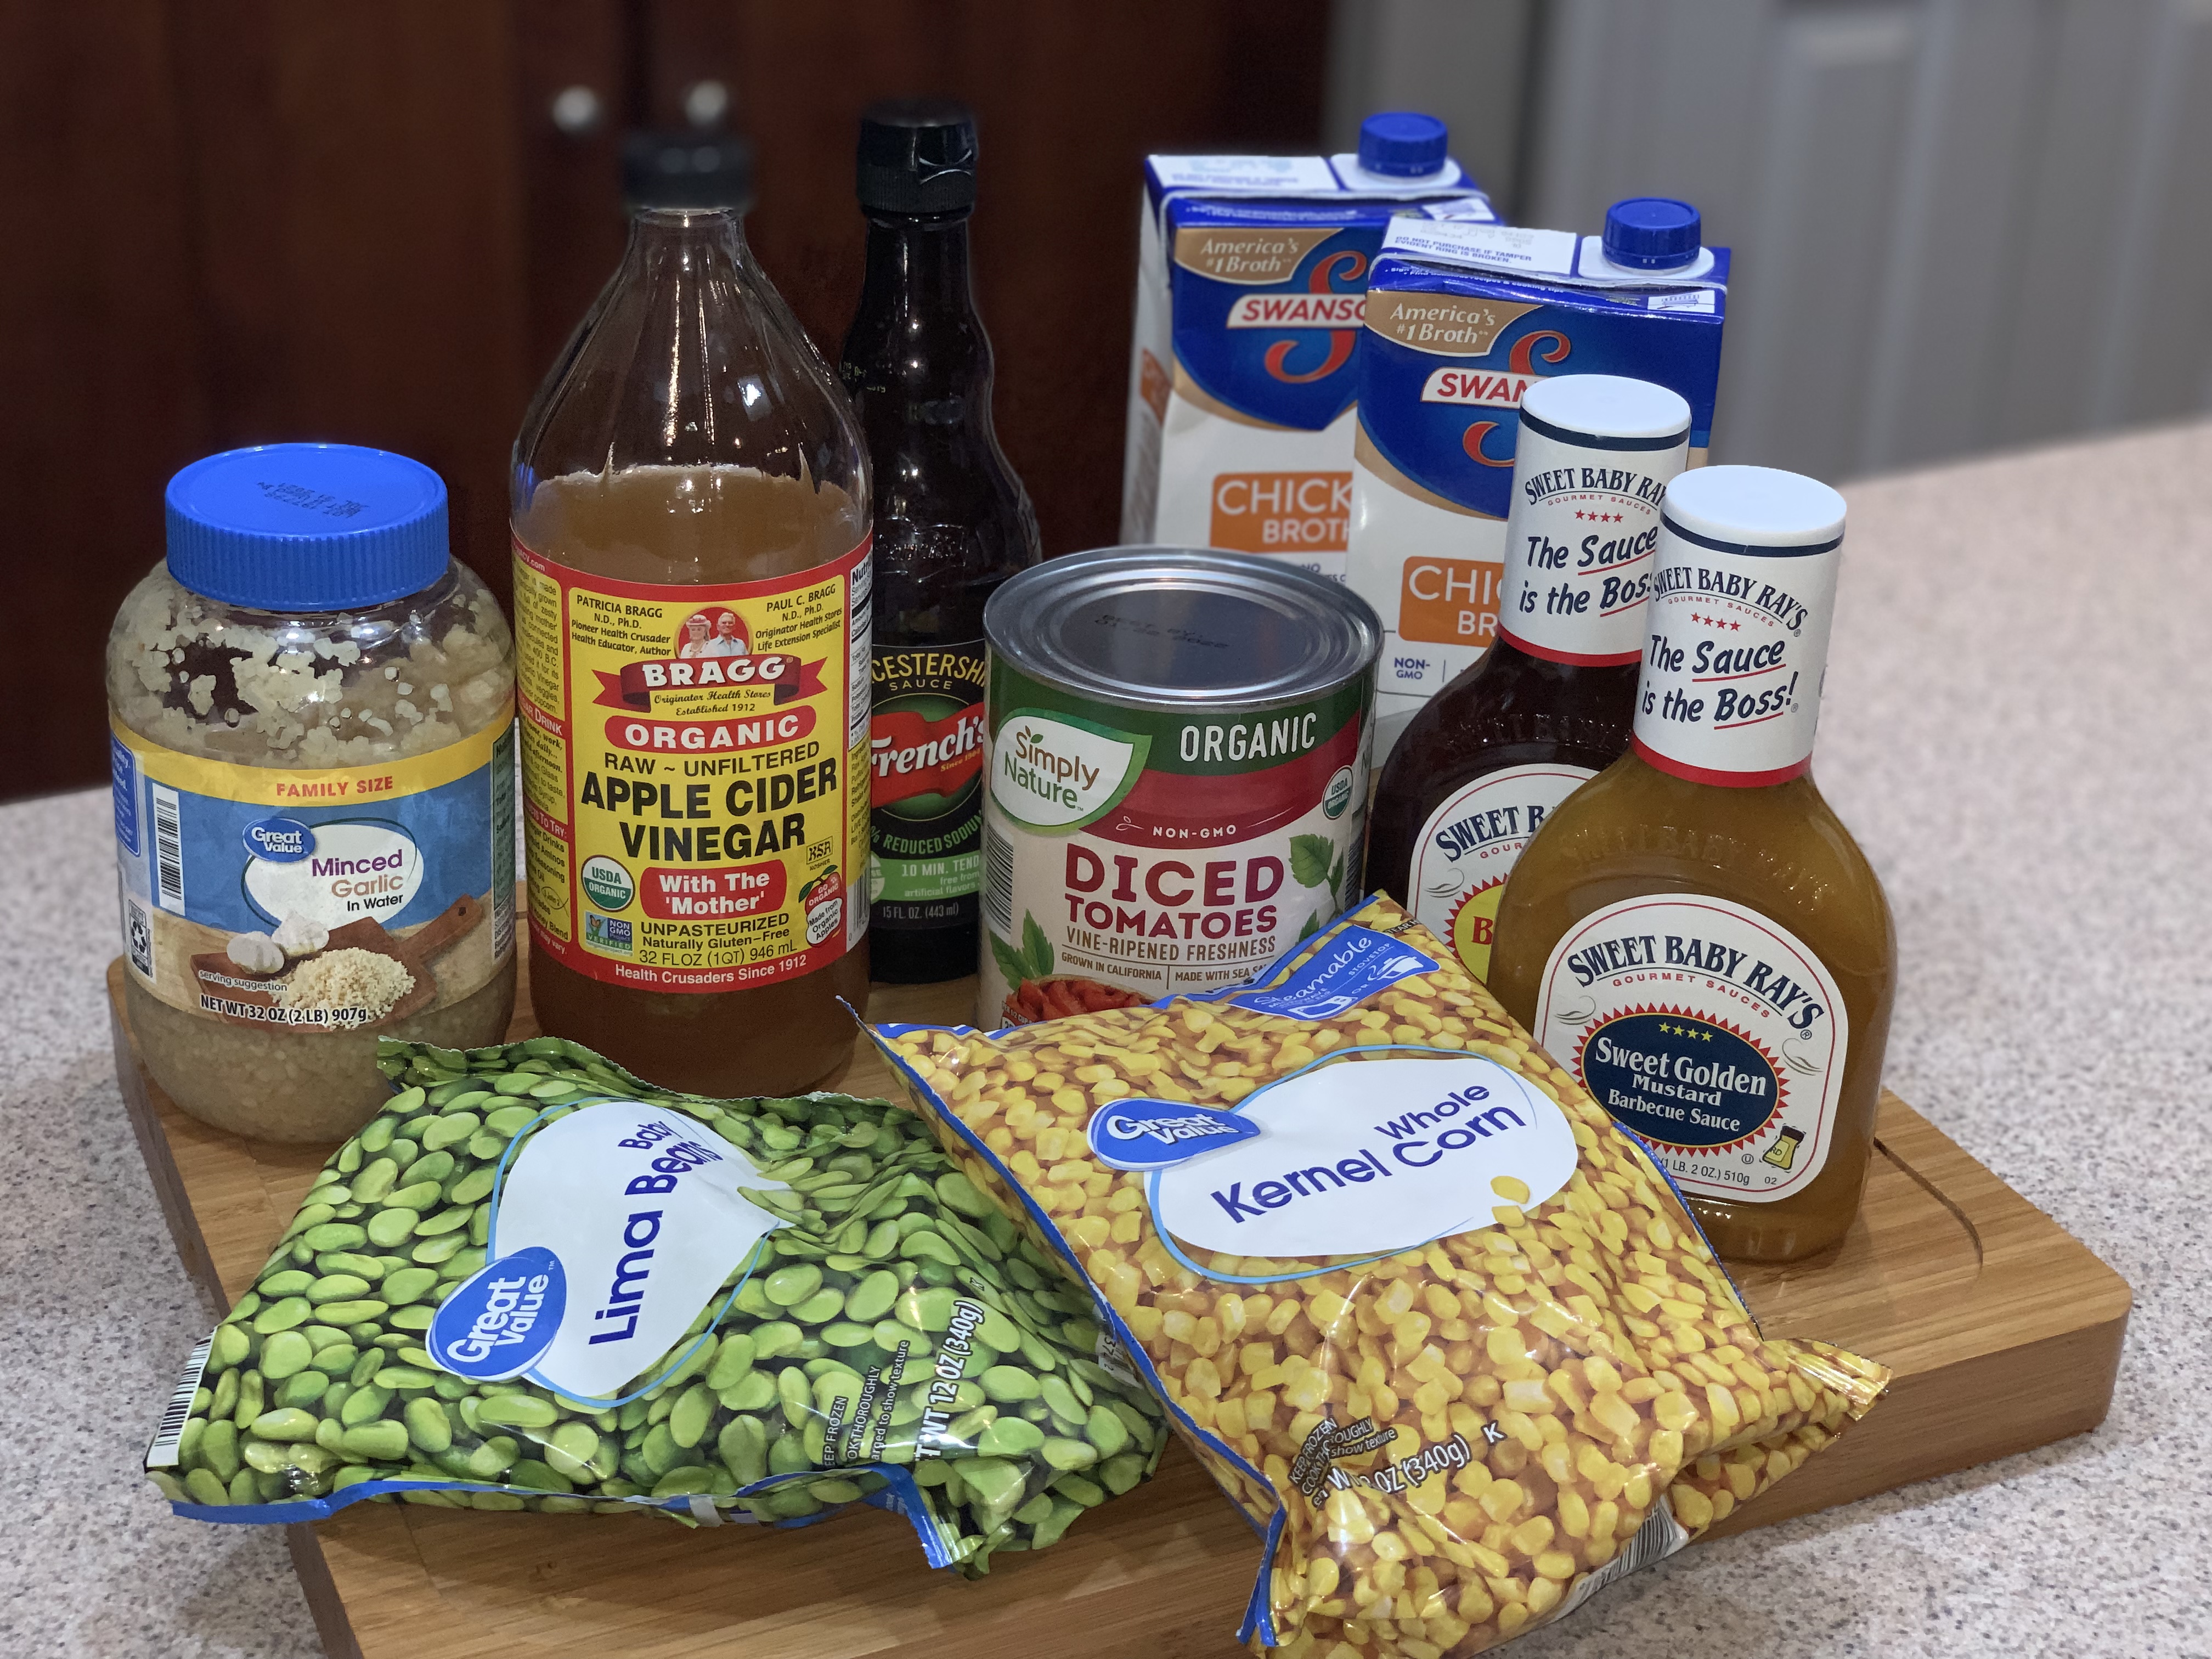
1 onion, chopped
1 tbsp garlic
5 cups chicken stock
1 large (28 oz) can diced tomatoes, with juice
2 tbsp Worcestershire Sauce
2-3 chicken thighs, shredded
3 cups pulled pork
1/2 cup Sweet Baby Ray’s Regular BBQ sauce
3/4 cup Sweet Baby Ray’s Mustard BBQ sauce
2 tbsp apple cider vinegar
12 oz package of frozen lima beans
12 oz package of frozen whole kernel corn
6 potatoes, diced
1/2 tsp black pepper
1 tsp salt
Avocado oil spray

  • In large dutch oven, brown onions and garlic in avocado oil
  • Add worchestershire sauce, apple cider vinegar, Worcestershire Sauce, tomatoes and chicken stock to dutch oven and bring to a boil
  • Add in the vegetables, BBQ sauces, chicken, pork, salt and pepper – reduce heat to simmer.
  • Cover and simmer for 1 1/2 hours, for best blending of flavors – you can actually eat it anytime after your vegetables are done – it just gets more depth of flavor the longer it simmers.

*** If needed to thicken, create a slurry with a small amount of cold water and cornstarch and add to pot, allowing it to thicken.

How Does One Use Leftover Queso Blanco?

Friday, I made some queso blanco with green chilis – and I had some leftover. I had to decide how I would use the remaining queso (I’ve made it a mission, lately, to try to minimize waste – and, I have done a great job with that!).

I had a bratwurst from Saturday and wanted to eat that for dinner – and decided that some fries would be good. And, the queso blanco would be the perfect accompaniment!

All I did was cut up a few potatoes, toss in avocado oil – add some salt and cook in the oven at 425 degrees for 45 minutes.

Then topped with the warmed up queso.

It was a delicious, easy meal to end the weekend!

Not a recipe – but a way to keep your ingredients fresh, for any recipe!

This post isn’t about a recipe – but, rather, a review of the truly INEXPENSIVE vacuum sealing device that I’m now using!

I purchased the Mueller vacuum sealer from amazon. This vacuum sealer was $49.97, with a $10 coupon. So, $40 for a sealer that works great!! Check it out here: Mueller Vacuum Sealer.

The sealer comes with some bags to start, but I also ordered an additional roll of bags, also from amazon.

This roll, which will last a long time, comes with a cutter – it was priced at $19.99, but I had a $5 coupon, so I got it for $15!! Can’t beat that!

I’ve mostly used it to vacuum seal meats for the freezer (that’s really what I bought it for), as I like to buy the big family packs and separate for individual use.

Today, I needed to separate some ground beef – I used the air tight / moist food setting, for the beef and it worked perfectly. Before sealing, I kind of ‘flattened’ the ground beef (leaving plenty of room for sealing), to allow it to take up less storage space in the freezer.

Don’t forget to label it and it’s ready to go into the freezer! Ive been so pleased with being able to: save $ by buying family packs, keep my food fresher for longer, and keeping my freezer nice and organized!

You can certainly use it for more than meat, and I am sure I will at some point – but, even if you only ever use it for meat – it’s well worth the investment!

If you decide to try this vacuum sealer, let me know – would love your feedback!!

Easy Red Chicken Chili

WHAT?! It is Sunday and I’m not making pasta? What in the world is happening here?? Oh, well… chicken chili it is!

This recipe is very easy to throw together and you likely have all of the ingredients on hand. I had 2 chicken breasts (3 may have been better – but, you work with what you have!) that I had defrosted in the refrigerator (thinking that I’d be making pasta – best laid plans, I guess!). Cans of beans and tomatoes in the pantry and some fresh cilantro and Colby & Monterrey Jack cheese. Chicken chili sounded good!

The chicken breasts were separated from a family pack, into a separate freezer bag (it’s cheaper to buy the family pack and repackage to amounts you’d use!). I’ve, since, bought a very inexpensive vacuum sealer that I’m using – if you’re interested in which one I got – let me know, I can do a review on here!!

As all good recipes do, this one started with me chopping up some onion…

Rather than cube the chicken, I decided to cook it whole and then shred it. Given that direction, I sprayed the dutch oven (have I mentioned how much I LOVE my Le Creuset dutch oven? I’m not a fancy person, at all, but was given this as a 20 year anniversary gift from the company I work for – and I, absolutely, adore it!!) with some olive oil – added in the onion and garlic (medium to high heat), cooking until the onions were mostly translucent. Then I added the chicken breasts, browning both sides to lock in the moisture.

While the chicken was browning, I opened the can of chipotle peppers and rough chopped them (my daughters probably wouldn’t be excited to get a mouth full of a chipotle pepper, so chopping makes sense). I did not throw out the adobo sauce, as it really adds to the chili, so hold onto it!!

After the chicken is browned and the chipotle peppers are chopped, it was time to start adding everything to the pot – tomatoes, beans, peppers – all straight into the pot. Also, add the chili seasoning at this time (and any salt and pepper you may want). I allowed the pot to come to an initial boil, then reduced the heat – covered and set a timer. You’ll want to let it simmer for 45 minutes to an hour (longer is better, in my opinion).

Once the timer goes off – remove the chicken breasts from the pot and shred.

Then return to the pot, add some cilantro, cover and simmer for another 30 minutes!

I decided to top mine with some grated Colby & Monterrey Jack cheese (fresh grated is best!) and cilantro – perfection!

Easy Red Chicken Chili

2-3 chicken breasts
1 tsp cumin
1 large onion, rough chopped
2 tbsp garlic, minced
1 small can Rotel tomatoes and chilis
1 large can petite diced tomatoes
1 large can crushed tomatoes
1 can garbanzo beans
1 can dark red kidney beans
1 can black beans
1 small can chipotle peppers in adobo sauce (chop peppers, reserve sauce)
1 packet of McCormicks chili seasoning mix
avocado spray
salt / pepper to taste
Cilantro and cheese to garnish (I also add some cilantro to the pot of chili at the end of cooking)

  • Rough chop the onion
  • Spray pan with avocado oil and add onion, garlic and cumin. Cook until onions are translucent.
  • Add whole chicken breasts – cook until browned on both sides (locks in the moisture!)
  • Add all tomoatoes, beans and (chopped) chipotle pepper (with sauce) to pot.
  • Stir through to combine all ingredients
  • Add seasoning mix, salt and pepper – stir and bring to boil.
  • Reduce heat, cover and simmer for 45 min – 1 hour.
  • Remove chicken breasts from pot, shred and return to pot.
  • Add cilantro, stir and serve.
  • Top with more cilantro and cheese for garnish (** would also be good topped with sour cream, jalapenos, corn chips, etc.)

Welcome to Michelle Cooks – I’m happy you’re here!

“There is no love sincerer than the love of food.” 
― George Bernard Shaw, Man and Superman

My name is Michelle and I love to cook. I love the process of creating new recipes and just ‘throwing things together’ and hoping for the best. I have some hits and misses – but, I love the process, none the less – and even the misses often lead to new ideas.

I love all food, truly – but, I do have some favorites. I love pasta, one pot/skillet meals, crock pot meals and anything that reheats well (I love leftovers!).

I plan to share my hits and my misses – in the hopes that others are inspired to be creative in the kitchen!